Snacks
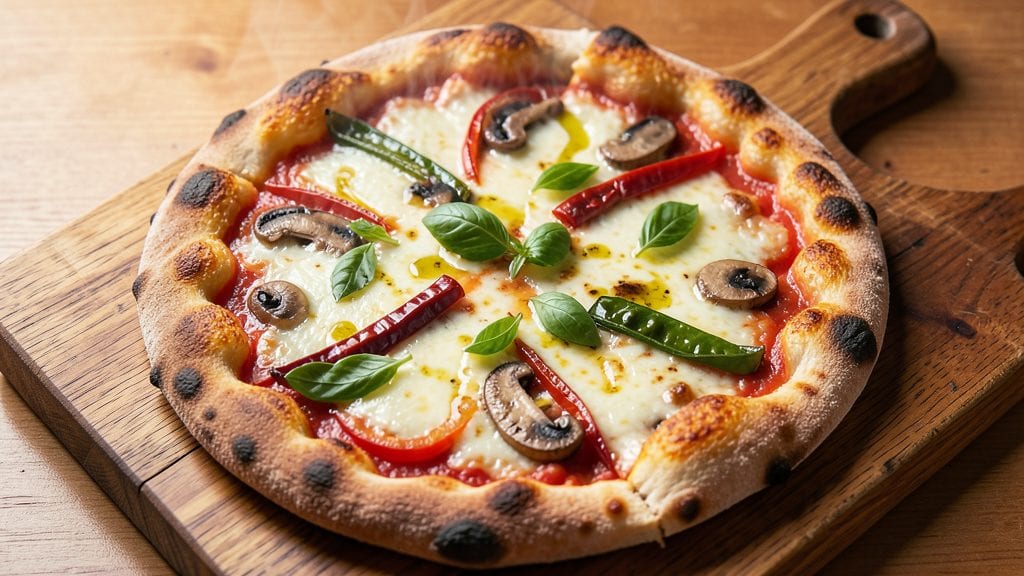
Creating Babish's pizza recipe at home delivers that iconic Neapolitan-style crust with its signature blistered edges and chewy center—exactly what makes this dish legendary. The secret lies in a precise dough formula and baking technique that transforms simple ingredients into restaurant-quality results.
I’ve perfected this method over years of testing, ensuring every slice delivers that perfect balance of crispy, charred edges and soft, airy interior.
This recipe starts with a thick, chewy crust that’s both sturdy enough to hold toppings and tender enough to melt in your mouth. The dough requires careful handling—yeast activation, proper kneading, and a long fermentation—but the process is straightforward with standard kitchen tools.
We’ll use a simple tomato sauce base, fresh mozzarella, and classic toppings like basil and olive oil, all baked in a hot oven to achieve that signature blister.
The result is a pizza that looks and tastes like it came straight from Naples: golden, bubbly, and irresistibly crispy at the edges while remaining soft in the center. The sauce is vibrant yet not overpowering, and the cheese stretches perfectly, creating that signature pull-apart texture.
This isn’t just pizza—it’s a foolproof method for recreating Babish’s legendary style at home.
Whether you’re feeding a crowd or treating yourself, this recipe scales beautifully and adapts to your favorite toppings. Let’s get started on creating the perfect slice—just like Babish intended.
Ingredients for babish pizza
Simple ingredients transform into legendary Neapolitan-style pizza with crispy edges and chewy center.
| Ingredient | Amount | Notes |
|---|---|---|
| Active Dry Yeast 🍞 | ¼ tsp | Instant yeast works too |
| Granulated Sugar 🍬 | 1 tbsp | Feeds yeast for activation |
| Warm Water 💧 | 1 cup | 110°F (43°C) ideal |
| All-Purpose Flour 🌾 | 2 ½ cups | King Arthur preferred |
| Fine Sea Salt 🧂 | 1 ½ tsp | Diamond Crystal preferred |
| Extra-Virgin Olive Oil 🫒 | ½ cup | High-quality, fruity |
| San Marzano Tomato Sauce 🍅 | 1 cup | Canned, crushed tomatoes |
| Fresh Mozzarella 🧀 | 8 oz | Low-moisture alternative |
| Fresh Basil Leaves 🌿 | ¼ cup | Torn, not chopped |
| Garlic Cloves 🧄 | 3 cloves | Minced for sauce |
| Cornmeal 🌽 | ¼ cup | For dusting pizza peel |
| Semolina Flour 🌾 | ¼ cup | Optional for crust texture |
| Baking Stone 🔥 | 1 whole | Or inverted baking sheet |
| Wood-Fired Pizza Peel 🍕 | 1 whole | Or parchment paper |
The yeast is non-negotiable—King Arthur or Bob’s Red Mill work best for consistent rises. If your kitchen runs warm, reduce yeast to 0.2 tsp to prevent overproofing. The flour should be unbleached all-purpose—bread flour makes the crust too dense. For the olive oil, California Extra Virgin from Trader Joe’s or Whole Foods delivers that fruity punch. The mozzarella? Fresh, milky mozzarella from the deli section is worth the splurge—low-moisture shreds just won’t melt the same way. Pre-grated cheese has anti-caking agents that ruin the texture.
No San Marzano tomatoes? Any high-quality canned crushed tomatoes work—just remove skins for smoother sauce. Fresh basil wilting? Dried basil at one-third the amount saves the day, though fresh is ideal. Running low on cornmeal? Semolina flour works perfectly for dusting. No pizza stone? A preheated baking sheet or even a cast-iron skillet in a screaming-hot oven gets close. The key is 900°F+ heat—your oven’s broiler on high plus a pizza steel helps. No steel? Invert a baking sheet and place it on the bottom rack while preheating.
This dough keeps 2 days in the fridge or 3 months frozen—portion into balls before freezing for easy use. The sauce can be made 3 days ahead and stored in the fridge. For that authentic blister, preheat the stone for 60 minutes before baking. If your peel isn’t wood-fired, parchment paper works but may not get quite as crispy. Leftovers? Reheat in a 350°F oven for 10 minutes—never the microwave.
Why You'll Love This Recipe
- No-Knead Magic: I swear by this dough—just mix, let it rise, and forget about it. That warm water and sugar combo wakes up the yeast like a morning coffee, giving me a pillowy, airy crust without a single punch or roll.
- Crust That Cracks: Here’s what sold me—the crust’s got that perfect snap. The fine sea salt in the dough? It’s not just seasoning; it’s the secret to that crispy edge with the chewy center. My kids fight over the last slice.
- Budget Stretch: Four ingredients, endless possibilities. This dough is my go-to for weeknight dinners, potlucks, or when I’m craving pizza but don’t want to spend $15 on delivery. Honestly, it’s the only dough I make anymore.
- Leftovers? Never: The dough keeps for days in the fridge, and the pizza reheats like it’s fresh. I’ll be real: I’ve had it cold the next day, and it’s still better than most takeout. Zero waste, all flavor.
Step-by-step instructions for Babish's pizza recipe
Here's how to craft a Neapolitan-style pizza with a blistered crust and authentic flavor—just like the pros.
Activate the Yeast for a Light, Airy Dough
In a small mixing bowl, combine the 0.25 tsp active dry yeast with the 1 tbsp granulated sugar and 1 cup warm water (about 110°F). Let it sit for 5-10 minutes until the mixture becomes frothy and bubbly—this confirms the yeast is alive and ready to work. If it doesn't bubble, your yeast may be dead, and you'll need to start over.
I always use a glass bowl for this step so I can easily see the bubbles forming. The sugar feeds the yeast, kickstarting fermentation, which is crucial for that signature Neapolitan lightness. Once it's bubbly, proceed immediately to avoid overproofing.
Mix the Dough to Develop Gluten
In a large bowl, whisk together the 2.5 cups all-purpose flour and 1.5 tsp fine sea salt. Create a well in the center and pour in the yeast mixture along with the 0.5 cup extra-virgin olive oil. Using a wooden spoon, gently mix until a shaggy dough forms, then turn it out onto a lightly floured surface.
Now for the fun part—kneading. Work the dough for 8-10 minutes until it becomes smooth and elastic. You'll know it's ready when it springs back slowly when poked. This step develops gluten, which gives your pizza that perfect chewy texture. If the dough feels too sticky, add flour 1 tablespoon at a time—but don't overdo it, or your crust will be dense.
Let the Dough Rest for Maximum Flavor
Place the dough in a lightly oiled bowl, cover it with a damp towel, and let it rise at room temperature for 1-2 hours, or until it has roughly doubled in size. This slow rise allows the gluten to relax and the flavors to meld. I like to do this at room temperature rather than the fridge for a more authentic Neapolitan taste—it's faster and yields a lighter crust.
After the initial rise, punch down the dough to release any air bubbles. Divide it into 4 equal balls (about 8 oz each), then let them rest uncovered for another 30 minutes. This second rest ensures the dough is relaxed and ready to stretch without tearing. The uncovered rest also helps develop a slightly crispier crust.
Stretch and Top the Pizza Like a Pro
Preheat your oven to its highest setting (usually 500-550°F) with the baking stone inside. While the oven heats, dust the wood-fired pizza peel with 0.25 cup cornmeal and 0.25 cup semolina flour for easy release. Take one dough ball and gently press it into a 12-inch circle, stretching from the center outward. If it resists, let it rest a few more minutes—don't force it, or you'll tear the dough.
Spread ¼ cup San Marzano tomato sauce over the stretched dough, leaving a ½-inch border for the crust. Tear the 8 oz fresh mozzarella into irregular chunks and scatter them over the sauce. Add 3 minced garlic cloves and a handful of torn fresh basil leaves for brightness. Season lightly with salt and pepper—you'll add more after baking.
Bake for a Blistered, Wood-Fired Crust
Quickly transfer the topped pizza to the preheated oven using the pizza peel. Bake for 9-12 minutes until the crust is deep golden brown with charred spots and the cheese is bubbling. The edges should puff dramatically and develop those coveted blisters. If your oven isn't hot enough, the crust won't crisp properly—this is where high heat makes all the difference.
Remove the pizza and let it rest for 2 minutes before slicing. The crust will firm up slightly as it cools, but it should still be soft and chewy inside. Serve immediately with extra torn basil and a sprinkle of flaky sea salt. Each slice should deliver that perfect balance of crispy crust, tangy sauce, and melty cheese—just like Babish's legendary pizza.
Pro Tips For Making Babish Pizza
- TEST THE YEAST FIRST: Skip straight to mixing and you might end up with dense, flat dough—no matter how long you let it rise. Sprinkle that active dry yeast into a small bowl with ¼ cup warm water and a pinch of sugar first. If it’s not foaming within 5–10 minutes, your yeast is dead or your water’s too hot (or cold). Toss it and start fresh—this saves you from a sad, gummy pizza base later.
- WEIGH THE FLOUR: Measuring flour by scooping and leveling is a gamble, and this dough won’t forgive sloppy scoops. Use a kitchen scale for the all-purpose flour—aim for 500 grams give or take 10 grams. That’s the sweet spot for a crispy-yet-chewy crust. (Yes, even if your measuring cups are “clean.”)
- KNEAD UNTIL SILKY: Stop when the dough looks smooth and springs back when poked—that’s the moment. I used to over-knead and end up with tough dough, but the real test is this: stretch a small piece between your fingers. If it tears cleanly without sticking, you’re done. No guesswork, just feel.
- LET IT RISE TWICE: One rise is non-negotiable, but the second one—often skipped—is what gives Babish pizza its signature airiness. After the first rise, punch down the dough and let it rest 10 minutes before shaping. Then, let it rise again for 1–2 hours at room temp. Patience here means a crust that’s light, not dense. (I know, I know—you want pizza now.)
Common mistakes when making perfect results
Overproofed Dough
One of the biggest mistakes is letting your dough rise too long, which creates a dense, gummy crust instead of the light, airy texture we want. I’ve ruined more pizzas than I’d admit by leaving dough out overnight!
The ideal rise time is 1-2 hours at room temperature—use a timer. If your kitchen is warm, reduce yeast to 0.2 tsp to slow fermentation. Always check for double size by gently pressing a finger into the dough; if it springs back slowly, it’s ready. 🌡️
Skipping the Rest
After kneading, many home cooks skip the 30-minute rest before shaping, leading to tough crusts. This rest relaxes the gluten, making the dough easier to stretch without tearing. I learned this the hard way when my first attempt resulted in a lumpy, uneven pizza.
Let those dough balls sit uncovered—the slight drying helps develop that crispy crust edge. Don’t rush this step!
Insufficient Heat
Baking at 500°F or lower won’t give you those signature blistered edges. I’ve seen home cooks bake at 425°F and end up with sad, flat pizzas. Preheat your oven with the baking stone for 60 minutes before baking.
If your oven lacks a broiler, place a pizza steel on the bottom rack to maximize heat. A 900°F+ oven is ideal—use your broiler on high for extra crispiness.
Overloading Toppings
Piling on too many toppings can weigh down the dough, preventing proper browning. I’ve seen pizzas with 1.5 cups of sauce and 12 oz of cheese—way too much! Stick to ¼ cup sauce and 8 oz mozzarella per pizza.
Heavy toppings also require longer baking, which can dry out the crust. Distribute toppings evenly and leave that ½-inch crust border for maximum crispiness.
Using Pre-Shredded Cheese
Pre-shredded cheese contains anti-caking agents that prevent proper melting, leading to a grainy texture. Fresh mozzarella is non-negotiable for that authentic pull-apart quality. If you must use shredded, opt for low-moisture mozzarella and tear it into chunks rather than spreading it like sauce.
The moisture content in fresh mozzarella is key for that perfect stretch and melt. 🧀
Not Preheating the Peel
Skipping the cornmeal/semolina dusting or using a cold peel can cause the dough to stick and tear. Always preheat your peel in the oven for 10-15 minutes before transferring the pizza. I also recommend using a wood-fired peel if possible—it conducts heat better than metal.
If you’re using parchment paper, place it directly on the peel and preheat it too. A well-preheated peel ensures easy release and even baking.
Nutrition facts
Frequently asked questions
What makes this Babish-style pizza different from regular Neapolitan?
The key differences lie in the dough technique and baking method. This recipe uses a longer fermentation at room temperature (1-2 hours) for maximum flavor development, plus a high-heat baking approach (500°F+) with a baking stone to create those signature blistered edges. The dough also includes extra-virgin olive oil for richness and a touch of cornmeal/semolina for texture.
Can I make this pizza without a pizza stone or peel?
For the stone, use a preheated baking sheet or cast-iron skillet on the middle rack. For the peel, simply use parchment paper—just preheat it in the oven for 10 minutes before transferring the pizza. The crust won't be quite as crispy, but it'll still be delicious. The secret is getting your oven as hot as possible (use the broiler for extra heat).
How do I know when the dough is properly proofed?
The dough is ready when it's roughly doubled in size and springs back slowly when gently pressed with a finger. If it springs back quickly, it needs more time. For visual confirmation, look for bubbles on the surface and edges that have pulled away from the bowl. Overproofing (when it collapses) is worse than underproofing—use a timer for 1-2 hours max at room temperature.
What if I don't have fresh mozzarella?
Use low-moisture shredded mozzarella as a second choice, but tear it into chunks rather than spreading it like sauce. For best results, combine it with 1 oz of fresh mozzarella if possible. Avoid pre-shredded cheese with anti-caking agents—it won't melt properly and will make your pizza grainy. A mix of fontina or provolone also works well for extra flavor.
Can I make the dough ahead of time?
Yes! The dough keeps for 2 days in the fridge or 3 months in the freezer. For fridge storage, shape into balls and place in an airtight container. For freezing, portion into 8 oz balls on a floured tray, freeze solid, then transfer to a bag. Thaw overnight in the fridge before using. The flavor actually improves with a longer fermentation, so this is a great time-saver.