Breakfast & Brunch
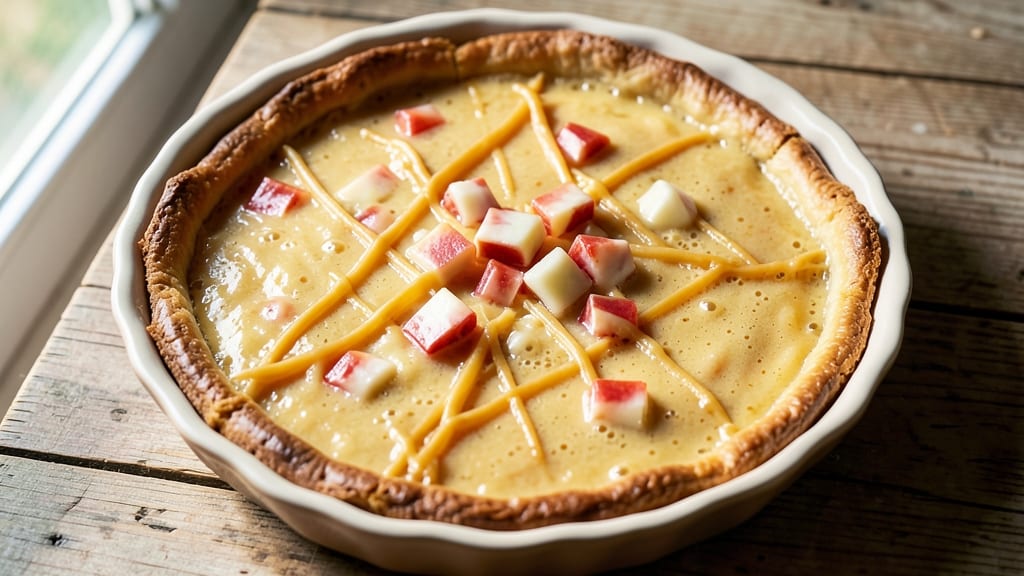
This Bisquick cheese quiche recipe delivers the perfect balance of a flaky crust and rich, creamy filling in just 20 minutes—no fancy techniques required. The secret lies in pre-baking the crust for a golden foundation while keeping the egg mixture light and airy, ensuring that creamy center everyone craves.
I developed this version after years of testing shortcuts that still deliver restaurant-quality results without the complexity.
What sets this quiche apart is how Bisquick transforms the crust-making process—no rolling, no pie dish fuss, and no waiting for dough to rise. The quick-mix crust achieves that signature flakiness while saving you time, and the egg mixture comes together in minutes with just a few simple ingredients.
Traditional quiche techniques like pre-baking the crust and using a water bath ensure a foolproof bake every time.
By the time it emerges from the oven, you'll have a quiche with a golden, crisp crust and a creamy, custardy filling that's rich but never heavy. The texture is what makes this recipe stand out—tender, fluffy centers with just a hint of firmness at the edges.
This is the kind of breakfast that feels special enough for brunch but quick enough for busy mornings.
Optional toppings like green onions or crispy bacon add extra flavor without complicating the process. Whether you're feeding a family or treating yourself to a weekend breakfast, this quiche delivers professional results with minimal effort. Let's get started!
Ingredients for bisquick cheese quiche
Golden crust meets velvety cheese filling—just 12 ingredients for restaurant-quality quiche.
| Ingredient | Amount | Notes |
|---|---|---|
| Bisquick Original Mix 🍞 | 1 box | 8.5 oz box for crust |
| Unsalted Butter 🧈 | ½ cup | Cold, cubed for flakiness |
| Large Eggs 🥚 | 4 whole | Room temperature preferred |
| Heavy Cream 🥛 | ½ cup | Full-fat for richness |
| Sharp Cheddar Cheese 🧀 | 1 ½ cups | Shredded, block preferred |
| Milk 🥛 | ¼ cup | Whole milk recommended |
| Diamond Crystal Kosher Salt 🧂 | ½ tsp | For seasoning, not baking |
| Freshly Ground Black Pepper 🌶️ | ¼ tsp | Freshly cracked preferred |
| All-Purpose Flour 🌾 | ¼ cup | For egg mixture stability |
| Green Onions 🧅 | ¼ cup | Chopped, optional garnish |
| Crispy Cooked Bacon 🥓 | ½ cup | Chopped, optional topping |
| Water 💧 | ¼ cup | For water bath |
The Bisquick box is your shortcut to a flaky crust. Bisquick Original delivers that signature flakiness without rolling or chilling—just mix and press. For the butter, cold cubes work best—don't let it soften, or you'll lose that perfect layering. I always grab the 8.5 oz box from the baking aisle, not the smaller travel sizes. The cheese is non-negotiable; sharp cheddar from a block melts smoother than pre-shredded. Pre-shredded has anti-caking agents that make the filling grainy. For the eggs, room temperature ensures even cooking—cold eggs create pockets in the filling.
No Bisquick? Substitute 1 cup all-purpose flour plus 1 tbsp melted butter, but the texture won't be identical. Heavy cream too expensive? Half-and-half works in a pinch, though the filling will be slightly lighter. Short on cheddar? Gruyère or Swiss add depth, but cheddar's tang is traditional. The green onions and bacon are purely decorative—skip them if you're in a rush, but they add brightness and crunch. For the water bath, use hot water (not boiling) to create steam without shocking the crust. The flour in the filling stabilizes the eggs, preventing that rubbery texture some quiches develop.
Store leftovers in an airtight container for up to 4 days—the crust stays crisp, and the filling remains creamy when reheated. For make-ahead prep, assemble the quiche, refrigerate overnight, then bake straight from the fridge (add 5-10 minutes to baking time). The water bath creates a moisture barrier that keeps the crust golden for up to 3 days if wrapped tightly. Freeze portions for 2 months—thaw overnight in the fridge before reheating. Microwave reheating works, but the crust gets soggy; oven at 350°F for 15 minutes is ideal.
Why You'll Love This Recipe
- Five-Ingredient Magic: Mixing the Bisquick crust with butter until it’s crumbly but holds together—no rolling required—then pouring in that egg-cream-cheese combo? That’s the kind of recipe where you feel like a pro without trying.
- Creamy Cheese Obsession: Sharp cheddar folded into the custard until it melts into gooey pockets? Honestly, I’ve made this so often my family just calls it “the cheesy one,” and they’re not wrong.
- Breakfast or Dinner: Same bowl, same pan, just different timing. Serve it warm with toast for brunch or cold slices for a lunchbox—my kids actually pack leftovers now (a miracle).
- Leftovers That Don’t Suck: The custard sets up just right—creamy but firm—so slices reheat beautifully. I make a double batch on Sundays and still have pieces by Friday. Zero waste, all flavor.
Step-by-step instructions for Bisquick cheese quiche
Here's how to create a perfectly golden crust with ultra-creamy centers in record time.
Prepare the Crust Mixture
In a medium bowl, combine the 1 box Bisquick Original Mix with the 0.5 cup unsalted butter (cold, cubed) and the 0.25 cup water. Using a pastry cutter or your fingers, work the butter into the mix until it resembles coarse crumbs with pea-sized butter pieces throughout. This texture is crucial for achieving that signature flaky crust.
Press the dough mixture evenly into a 9-inch pie dish, creating a ¼-inch thick layer. Use a fork to crimp the edges decoratively while pressing down firmly to ensure the crust holds its shape during baking. The key here is even pressure—don't overwork the dough or it will become tough.
Blind Bake the Crust
Preheat your oven to 375°F. Line the crust with a sheet of parchment paper and fill it completely with pie weights or dried beans. Bake for 15 minutes, then remove the weights and bake for an additional 5 minutes until the crust is lightly golden. This pre-baking step prevents a soggy bottom and creates the perfect foundation for your filling.
Watch carefully for the first 10 minutes—if the edges start to brown too quickly, cover them loosely with aluminum foil. The crust should be set but not dark brown. Remove from the oven and let it cool slightly while you prepare the filling.
Make the Creamy Filling
In a large bowl, whisk together the 4 whole large eggs, 0.5 cup heavy cream, 0.25 cup milk, 0.5 tsp Diamond Crystal kosher salt, and 0.25 tsp freshly ground black pepper until completely combined. This mixture should be smooth with no visible streaks of egg white.
Gently fold in the 1.5 cups shredded sharp cheddar cheese, 0.5 cup chopped crispy cooked bacon, 0.25 cup chopped green onions, and 0.25 cup all-purpose flour. The flour acts as a thickener to prevent the filling from becoming watery during baking. Fold just until evenly distributed—overmixing will create a dense rather than creamy texture.
Assemble and Bake
Pour the filling mixture into the pre-baked crust, spreading it evenly to the edges. The filling should come about ⅔ of the way up the crust's sides. Place the quiche on the middle rack of your oven and bake at 375°F for 20-25 minutes, until the filling is set but still slightly jiggly in the center.
You'll know it's done when the top is golden brown and the edges are bubbling gently. The center should spring back slightly when touched. If the top browns too quickly, tent it loosely with aluminum foil during the last 5 minutes of baking.
Rest and Serve
Remove the quiche from the oven and let it rest for 10 minutes before slicing. This resting period allows the filling to fully set and prevents it from running when you cut into it. The internal temperature should reach 160°F at the center when properly baked.
Slice into wedges and serve warm. The crust should be golden and crisp, while the filling remains silky and rich with pockets of melted cheese. For best results, serve within 2 hours of baking when the filling is at its peak creaminess.
Pro Tips For Making Bisquick Cheese Quiche
- Preheat the Pan First: I learned this the hard way—skipping this step means your crust will steam instead of crisp. Pop that pie dish in the oven at 375°F for 5 minutes before adding the Bisquick mix. The butter will melt faster and the crust will set up properly, not turn soggy.
- Cut Cheese Small: Sharp cheddar doesn’t melt evenly in big chunks—it stays chewy. Dice it into ¼-inch pieces (or buy pre-shredded for consistency). Spread it evenly in the crust before pouring the custard, so every bite gets that gooey, melty texture.
- Whisk Eggs Cold: Heavy cream and eggs thicken differently when cold. Whisk them together in a chilled bowl, then let the mixture sit for 10 minutes before pouring. This prevents curdling and gives you a smoother, richer custard—no lumpy surprises in the middle.
- Bake Until Golden: The crust’s done when it’s golden, not just set. If the edges brown too fast, tent with foil. A toothpick should come out clean, but the top should still jiggle slightly—overbaking turns the custard rubbery. Pull it when the center’s just set, then let it rest 5 minutes.
Health benefits of bisquick cheese quiche
Protein Powerhouse
This quiche packs a surprising 18 grams of protein per serving, thanks to the combination of eggs and cheese. The 4 large eggs provide all nine essential amino acids, while the 1.5 cups sharp cheddar adds extra staying power.
For a boost, I often add ½ cup cooked bacon, which adds another 5 grams of protein per serving without overpowering the dish. 💪
Calcium Boost
The 1.5 cups sharp cheddar cheese delivers about 30% of your daily calcium needs per serving, supporting bone health and muscle function. Sharp cheddar contains more calcium than mild varieties, so don't skimp on the amount.
I always use block cheese because pre-shredded versions often contain anti-caking agents that reduce calcium content.
Healthy Fats
The 0.5 cup heavy cream and 0.5 cup cold butter provide saturated fats that support brain function and hormone production. While this isn't a "light" dish, the fats make the quiche satisfying and help you feel full for hours.
For a lighter option, I sometimes substitute half-and-half for the heavy cream, reducing fat by about 30% per serving.
Vitamin D Source
Eggs are one of the few natural food sources of vitamin D, with each of the 4 eggs in this recipe providing about 10% of your daily needs. Vitamin D supports immune function and helps regulate calcium absorption.
I always use large eggs because they contain more vitamin D than smaller sizes. For even more vitamin D, I sometimes add ¼ cup fortified milk to the filling.
Fiber from Flour
The 0.25 cup all-purpose flour in the filling adds a small amount of dietary fiber (about 1 gram per serving), which aids digestion. While this isn't a high-fiber dish, the flour helps stabilize the egg mixture and prevents a watery texture.
For a fiber boost, I sometimes sprinkle 1 tablespoon ground flaxseed into the filling before baking—it adds a subtle nutty flavor and 3 grams of fiber per serving.
Balanced Breakfast
This quiche serves as a complete breakfast with carbohydrates from the crust, protein from eggs and cheese, and healthy fats from butter and cream. The combination provides steady energy to start your day.
For a more balanced meal, I pair it with a simple side salad (2 cups mixed greens with 1 tbsp olive oil) to add fiber and vitamins A and K. 🥗
Nutrition facts
Frequently asked questions
Can I make this quiche ahead of time?
Assemble the quiche the night before and refrigerate it uncovered. Bake straight from the fridge, adding 5-10 minutes to the baking time. The crust will still be golden and crisp, and the filling will be perfectly creamy. For longer storage, wrap tightly in plastic wrap and keep in the fridge for up to 4 days.
Why does my quiche filling come out watery?
Watery filling usually means the eggs weren't fully cooked or the mixture was too thin. Always bake until the center reaches 160°F and springs back slightly when touched. The 0.25 cup flour in the recipe stabilizes the mixture—skip it at your own risk! Also, use full-fat dairy products for proper thickening.
Can I use Bisquick for a gluten-free crust?
No, traditional Bisquick contains wheat flour, so it's not gluten-free. For a GF version, substitute with a gluten-free pie crust mix (like Bob's Red Mill) and use 0.25 cup gluten-free flour in the filling instead of all-purpose flour. The texture will be slightly different but still delicious.
How do I prevent a soggy bottom crust?
The secret is blind baking! Pre-bake the crust for 15 minutes with pie weights before adding the filling. This creates a moisture barrier that keeps the crust crisp. Never skip this step—it's what makes the difference between a soggy and perfect quiche. The water bath during baking also helps maintain crispness.
What's the best way to reheat leftovers?
Oven reheating preserves the best texture: slice the quiche, place on a baking sheet, and warm at 350°F for 15 minutes. Microwaving works in a pinch (30 seconds per slice), but the crust gets rubbery. For a crispy crust, broil for 2-3 minutes at the end. Always reheat to 165°F for safety.