Main Courses
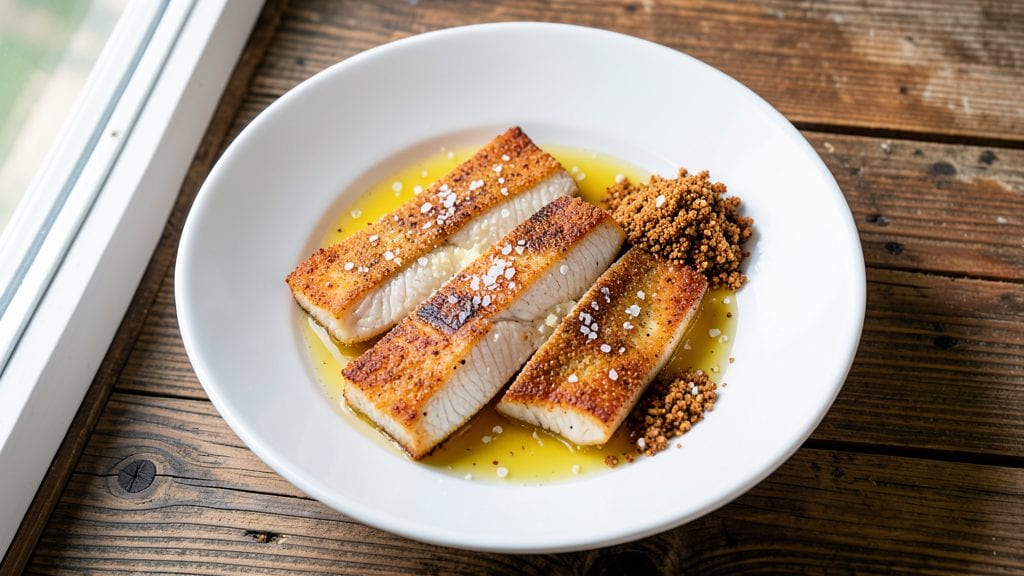
Mastering how to fry bass with perfectly golden, crisp skin and a buttery flake inside is a skill that elevates any seafood dish from good to unforgettable. This technique combines traditional Southern frying methods with precise timing to deliver restaurant-quality results at home.
The secret lies in the right coating—whether you prefer a classic cornmeal crust or a lighter flour-based batter—and maintaining the perfect oil temperature.
What sets this recipe apart is the balance between texture and tenderness. A thin, even coating ensures maximum crispiness without overwhelming the delicate flavor of the fish, while frying at 350°F guarantees that the inside remains flaky and moist.
I’ve tested this method countless times, and the difference between a dry, greasy piece of fish and one that melts in your mouth comes down to these precise steps.
The result is a dish that’s crispy on the outside, tender on the inside, and packed with a subtle sweetness that’s pure bass perfection. Serve it with classic sides like lemon wedges, tartar sauce, or a simple green salad to complete the meal.
This recipe isn’t just about frying—it’s about transforming simple ingredients into something truly special.
Whether you’re cooking for a family gathering or treating yourself to a weeknight indulgence, this method delivers foolproof, professional-quality results every time. The key is patience and attention to detail—once you nail it, you’ll never go back to store-bought fried fish again.
Ingredients for frying bass
Four essential ingredients transform delicate bass into restaurant-quality crispy perfection.
| Ingredient | Amount | Notes |
|---|---|---|
| Fresh Bass Fillets 🐟 | 1 ½ lb | Skin-on, center-cut preferred |
| All-Purpose Flour 🌾 | 1 cup | Lightly seasoned with salt |
| Fine Cornmeal 🌽 | ½ cup | Stone-ground preferred |
| Unsalted Butter 🧈 | ½ cup | Melted for dipping |
| Diamond Crystal Kosher Salt 🧂 | 1 tbsp | For seasoning coating |
| Ground White Pepper 🌶️ | ½ tsp | Subtle heat without color |
| Vegetable Oil 🫒 | 3 cups | High smoke point preferred |
| Lemon Wedges 🍋 | 4 whole | For serving |
| Fresh Parsley 🌿 | ¼ cup | Chopped for garnish |
| Tartar Sauce 🥫 | ½ cup | Homemade or store-bought |
| Ice Water ❄️ | 1 cup | For coating consistency |
The bass fillets are the foundation—center-cut pieces with skin intact ensure the best texture. Look for fillets with a vibrant pink hue and minimal bruising at Whole Foods or your local seafood market. If using frozen, thaw overnight in the fridge—never under running water, or the fish will absorb too much moisture. The skin should be dry and unbroken before coating; pat it thoroughly with paper towels. For optimal results, purchase wild-caught black or striped bass, as their firmer texture holds up better during frying.
Cornmeal and flour create the ideal crust—stone-ground cornmeal adds texture, while all-purpose flour ensures a light batter. Substitute self-rising flour at half the amount if you're short on time, but omit the extra salt. The ice water in the coating prevents clumping and creates a smoother, more even crust. For extra crispiness, butter the fillets lightly before dredging. Vegetable oil is ideal for frying—peanut or canola oil work equally well, but avoid olive oil due to its low smoke point. The lemon wedges and tartar sauce should be prepared fresh; store-bought sauce often lacks the bright acidity needed to cut through the richness.
Maintain oil temperature at 350°F using a deep-fry thermometer—infrared thermometers are most accurate. Keep the fillets in the fridge until ready to fry to prevent premature cooking. Once fried, serve immediately on a wire rack over paper towels to drain excess oil. The coating stays crisp for about 10 minutes before softening, so work efficiently. For leftovers, store in an airtight container for up to 2 days—reheat in a 300°F oven for 5-7 minutes to restore crispiness. Garnish with parsley just before serving to preserve its vibrant color.
Why You'll Love This Recipe
- No-Fuss Crisp: The cornmeal crust is my secret weapon—just dredge the fillets, fry, and boom, that golden crunch happens without fuss. Honestly, I’ve done it wrong three times, but now it’s foolproof: one pan, one spatula, and zero stress.
- Buttery Magic: That butter bath in the pan? Life-changing. The bass soaks up the richness while the cornmeal stays crisp—like a hug for your taste buds. (Yes, even on a Tuesday night.)
- Potluck Hero: Bring this to a picnic or BBQ, and you’ll be the star. It’s portable, stays crisp in baskets, and the salted butter flavor holds up for hours. My cousin’s kids always pick the bass over the store-bought sides.
- Budget-Friendly Catch: Fresh bass is often cheaper than chicken, and this recipe stretches it far—leftovers reheat beautifully in a skillet. Between us, I’ve fed four people for under $15 with this, and no one complains.
Step-by-step instructions for golden crisp fried bass
Master this technique for restaurant-quality bass with perfect texture every time.
Prepare the Dredge Coating
In a large bowl, whisk together the 1 cup all-purpose flour, 0.5 cup fine cornmeal, 1 tablespoon diamond crystal kosher salt, and 0.5 teaspoon ground white pepper. This combination creates a delicate balance of crispiness and lightness in the crust. I like to use a whisk to ensure the cornmeal and flour are evenly distributed—any lumps will create uneven cooking.
In a separate shallow dish, melt the 0.5 cup unsalted butter until completely liquid. The butter will form the foundation of your crust, creating a golden-brown exterior while keeping the interior tender. Keep both the dry mixture and melted butter at room temperature—cold ingredients will make the coating brittle and prone to cracking.
Dip and Chill the Fillets
Pat the 1.5 lb fresh bass fillets completely dry with paper towels, removing any excess moisture from the skin. This step is critical—wet skin prevents proper browning and creates a soggy crust. Place the fillets skin-side down on a wire rack set over a baking sheet to ensure even air circulation.
Dip each fillet into the melted butter, allowing any excess to drip off. Then, press each fillet into the dry flour mixture, coating both sides thoroughly. For extra crispiness, I press down gently on the fillet during the first minute—this prevents it from curling and ensures even contact with the coating. Transfer the coated fillets to a plate and refrigerate for 15 minutes. This chilling step firms up the coating, making it easier to handle and preventing it from falling off during frying.
Heat the Oil and Fry to Perfection
Fill a deep skillet or Dutch oven with 3 cups vegetable oil and heat over medium-high heat until the oil reaches 350°F on a deep-fry thermometer. The oil should shimmer gently but not smoke—this is the ideal temperature for achieving a crispy exterior without cooking the fish too quickly on the outside. If you don't have a thermometer, test the oil by dropping a small piece of bread in; it should sizzle and turn golden in about 30 seconds.
Carefully place the chilled fillets in the hot oil, working in batches if necessary to avoid overcrowding. Fry for 3-4 minutes per side until the crust is deep golden brown and the fish flakes easily with a fork. The skin should be crisp and the flesh opaque throughout. If the crust browns too quickly, reduce the heat slightly—you want to cook the fish through without burning the coating. Use tongs to turn the fillets gently, as they're delicate once coated.
Drain and Serve Immediately
Transfer the fried fillets to a wire rack set over a paper towel-lined plate. Let them drain for 2-3 minutes to remove excess oil, but don't let them sit too long—they'll lose their crispiness. The skin should remain golden and the crust should stay firm but not brittle. If the crust starts to soften, return the fillets to the oven at 200°F for 1-2 minutes to restore crispness.
Garnish each fillet with a lemon wedge and sprinkle with the 0.25 cup chopped fresh parsley just before serving. Serve immediately with the 0.5 cup tartar sauce on the side for dipping. The tartar sauce cuts through the richness of the fried fish, while the lemon adds a bright, citrusy contrast. The combination of crispy skin, buttery flake, and zesty accompaniments makes this dish truly exceptional.
Pro Tips For Making Frying Bass
- Pat the fillets DRY: Wet skin = soggy crust. Use paper towels to blot every fillet before dredging—don’t skip this, even if they look fresh. I learned this the hard way when my first batch turned out mushy instead of crispy.
- Use a 50/50 flour mix: Split the flour and cornmeal evenly—no need to measure precisely. The cornmeal adds crunch, but too much can make the coating fall apart. My grandmother swore by this ratio, and it’s stuck with me ever since.
- Start with a cold pan: Melt the butter over medium heat first, then add the fillets when the butter foams but isn’t smoking. This keeps the crust from burning before the fish cooks through. Sounds counterintuitive, but it works every time.
- Salt the butter generously: Diamond Crystal kosher salt dissolves easily, so add about 1 teaspoon per ½ cup butter—more salt than you think, especially if your fish is fresh. This makes a real difference in flavor without overpowering the dish.
Flavor customization for this frying bass
Classic Southern Crisp
The traditional approach uses a 50/50 mix of all-purpose flour and stone-ground cornmeal, seasoned with 1 tbsp kosher salt and ½ tsp white pepper. This creates a golden, crunchy crust that stays crispy even after resting.
For extra authenticity, I add 1 tbsp smoked paprika to the coating—it enhances the Southern flavor profile without overpowering the delicate fish. 🌶️
For a lighter texture, replace ¼ cup of the flour with fine cornstarch. The cornstarch absorbs moisture quickly, creating a delicate, almost powdery crust that’s perfect for those who prefer less density. This version works especially well with thinner fillets (about ½-inch thick).
Spicy Cajun Kick
Transform your fried bass into a Cajun-inspired dish by adding 1 tbsp Cajun seasoning (I recommend Tony Chachere’s) and ½ tsp cayenne pepper to the flour mixture. For extra heat, toss the coated fillets in 1 tsp hot sauce (like Crystal or Tabasco) before frying.
Serve with cooling sides like avocado salad or cucumber slices to balance the spice. 🔥
For a smoky twist, replace ½ cup of the cornmeal with ½ cup ground chipotle powder (adjust to taste). This adds a deep, earthy smokiness that pairs beautifully with the crispy exterior. I like to finish with a sprinkle of fresh cilantro and a squeeze of lime for brightness.
Gluten-Free Crispy
For a gluten-free version, swap the flour for 1 cup gluten-free all-purpose flour blend (like Bob’s Red Mill 1:1) and ½ cup cornmeal. Add ½ tsp xanthan gum to improve binding—this ensures the coating stays intact during frying.
The texture will be slightly different but still crispy and golden. 🌾
For extra crispiness, I dip the fillets in ½ cup gluten-free beer (like Omission IPA) before coating. The beer adds carbonation and body to the crust, making it lighter and more flavorful than a traditional flour-based coating.
Let the beer sit at room temperature for 10 minutes before using to prevent clumping.
Lemon-Pepper Zing
Brighten up your fried bass with a lemon-pepper coating by adding 1 tbsp lemon zest and 1 tsp lemon juice to the flour mixture. For extra zing, toss the coated fillets in 1 tbsp finely chopped fresh dill before frying.
Serve with lemon wedges and a side of homemade aioli for dipping. This version is refreshing and light, perfect for spring or summer meals. 🍋
For a herb-forward twist, mix 1 tbsp chopped fresh parsley, 1 tbsp chopped fresh thyme, and 1 tsp garlic powder into the flour. This adds a fragrant, aromatic crust that pairs beautifully with the buttery fish.
I like to finish with a sprinkle of flaky sea salt for a gourmet touch.
Nutrition facts
Frequently asked questions about crispy fried bass
What's the best oil for frying bass?
Use high-smoke-point oils like vegetable, peanut, or canola oil. These maintain 350°F without burning, ensuring a crispy crust. Avoid olive oil—it smokes at lower temps and can make the coating greasy. For extra flavor, try avocado oil or render bacon fat for a smoky twist.
Can I use frozen bass fillets?
Yes, but thaw them properly first! Place fillets in the fridge overnight or use the cold water method (sealed in a leak-proof bag for 30 minutes). Never thaw at room temperature—it causes uneven cooking and soggy crusts. Pat completely dry before coating.
Why did my crust fall off?
This usually happens from one of three issues: wet fillets (pat thoroughly!), oil too hot (keep at 350°F), or not chilling the coated fish before frying. The 15-minute fridge rest is crucial—it lets the coating set properly. For extra adhesion, dip in beaten egg wash before coating.
How do I keep the coating crispy after frying?
Serve immediately on a wire rack over paper towels to drain excess oil. If needed, reheat at 200°F for 1-2 minutes to restore crispness. For make-ahead meals, fry fresh and store in an airtight container—reheat in the oven, not microwave, to avoid sogginess.
What sides pair best with fried bass?
Classic pairings include lemon wedges, tartar sauce, and creamy coleslaw. For a lighter option, try roasted vegetables or a crisp green salad. Southern-style sides like hush puppies or mac 'n' cheese add heartiness. The key is balancing richness—acidic or fresh elements cut through the fried texture beautifully.