Side Dishes
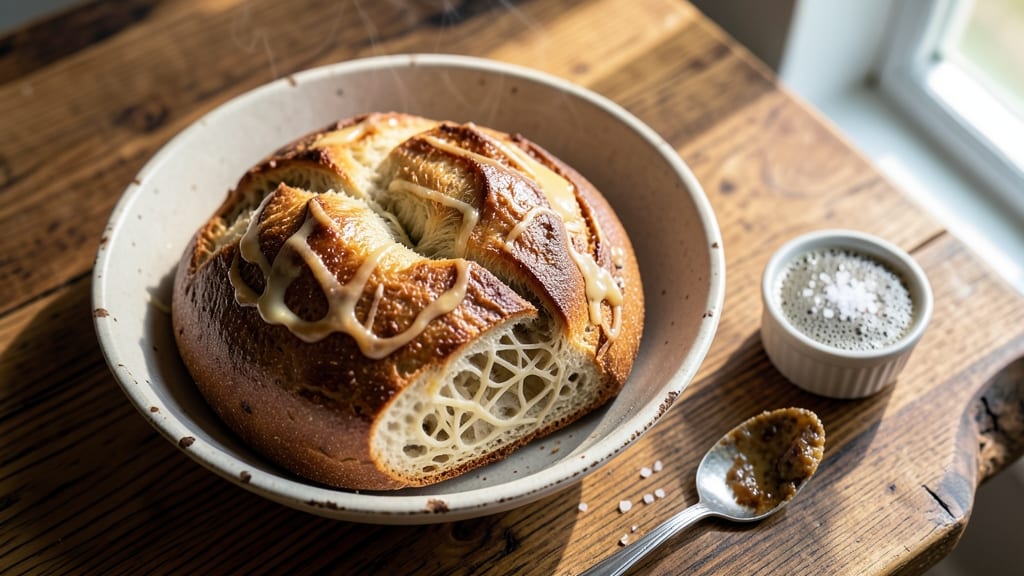
This homemade Artesano bread copycat recipe delivers bakery-quality crust that's crispy, airy, and packed with that signature Italian flair. I've spent years perfecting this version after falling in love with the original—it's the kind of bread that makes everything taste better, from simple soups to charcuterie boards.
The secret lies in the slow fermentation and high-heat baking that creates that perfect crunch.
The dough comes together with just a few simple ingredients but requires patience—letting it rise overnight develops deep flavor and that signature open crumb structure.
Don't worry if you're new to bread-making; I'll walk you through every step, from mixing to shaping, so you end up with a loaf that looks and tastes like it came straight from an Italian bakery. The crust should be golden and crispy while the interior stays soft and chewy.
By the time you pull this bread from the oven, your kitchen will smell like a warm Italian bakery and your taste buds will thank you. This recipe makes two beautiful loaves perfect for sharing—imagine slicing into that golden crust while it's still warm.
The best part? It's easier than you think, and once you master it, you'll never buy store-bought bread again.
Serve it fresh with olive oil and balsamic vinegar for dipping, or use it to elevate any meal from breakfast to dinner. Let's get started on making your own Artesano bread that'll impress everyone at your table!
Ingredients for artesano bread copycat
Simple ingredients with big Italian bakery flavor—just 14 staples for two showstopping loaves.
| Ingredient | Amount | Notes |
|---|---|---|
| Bread Flour 🌾 | 3 ½ cups | High-protein for structure and chew |
| Active Dry Yeast 🍞 | ¼ tsp | Fresh yeast works too (0.75 tsp) |
| Granulated Sugar 🍚 | ½ tsp | Feeds yeast for rise |
| Instant Yeast 🍞 | ¼ tsp | For faster fermentation |
| Salt 🧂 | 1 ½ tsp | Diamond Crystal preferred |
| Unsalted Butter 🧈 | ½ cup | Cold, cubed (not melted) |
| Whole Milk 🥛 | ¾ cup | Warmed to room temp |
| Water 💧 | 1 ¼ cups | Lukewarm, not hot |
| Olive Oil 🫒 | 1 tbsp | Extra-virgin for flavor |
| Honey 🍯 | 1 tbsp | For crust color and sweetness |
| Cornmeal 🌽 | ¼ cup | For dusting baking sheets |
| Coarse Sea Salt 🧂 | 1 tbsp | For sprinkling crust |
| Semolina Flour 🌾 | ¼ cup | For dusting loaves |
| Cornstarch 🌾 | 1 tbsp | For extra crisp crust |
The flour is non-negotiable—King Arthur or Caputo bread flour gives that signature open crumb. If you can't find either, all-purpose plus 1 tbsp vital wheat gluten works in a pinch. The yeast combo (dry + instant) speeds up fermentation without sacrificing flavor. Penzeys or the bulk bins at Whole Foods have the best quality. For the butter, Plugrá or Land O'Lakes unsalted melts beautifully—never salted. The milk should be warm enough to touch but not hot to the wrist (think baby bath temp).
No bread flour? All-purpose plus 1 tbsp vital wheat gluten gets you close, but the crumb won't be quite as open. Swapping honey? Maple syrup at the same amount works, but honey gives that signature golden crust. Short on olive oil? Avocado oil has a similar neutral flavor. The cornmeal and semolina might seem like extras, but they're what give that bakery-style crust. Bob's Red Mill has great quality at reasonable prices. And trust me, the cornstarch isn't just for show—it creates that perfect crispy snap.
This dough needs time—overnight cold fermentation is key for flavor. Store it in the fridge in an airtight container with plastic wrap pressed directly on the surface. The shaped loaves keep 2 days at room temp wrapped in a clean kitchen towel, or 5 days in the fridge. For freezing, bake the loaves, cool completely, then wrap tightly in foil and freeze. 3 months is the max, but honestly, they're best fresh. Slice with a serrated knife—it's worth the extra minute.
Why You'll Love This Recipe
- No-Knead Magic: I’ll be real—this dough comes together in five minutes of actual work. Just toss the bread flour, yeast, sugar, and salt in a bowl, add warm water, and let the yeast do the heavy lifting while you sip coffee. No stand mixer, no arm workout, just pure convenience.
- Crusty Yet Tender: That perfect balance? The bread flour’s high protein gives it a satisfying chew, while the instant yeast (mixed with active dry for extra punch) delivers a crackly crust that shatters like a fresh-baked dream. Honestly, it’s the kind of texture that makes you pause mid-bite.
- Weeknight Hero: Between us, this is my go-to when I forget to meal prep. Toast it for breakfast, tear it into sandwiches at lunch, or use it to soak up olive oil and balsamic for dinner—no waste, all flavor. Even my picky teen grabs a slice straight from the pan.
- Budget Bread Wins: Four ingredients, zero frills, and enough loaves to feed a crowd for pennies. The sugar feeds the yeast, the salt sharpens the flavor, and the bread flour delivers professional results without the bakery price tag. My grocery bill and my taste buds thank me every time.
Step-by-step instructions for artesano bread copycat recipe
Here's how to nail that bakery-style crust and airy crumb at home—every detail matters!
Activate the Yeast and Prepare the Dough Base
In a large bowl, whisk together the 1.25 cups water and 0.5 tsp granulated sugar until fully dissolved. Sprinkle in the 0.25 tsp active dry yeast and let it sit for 5-10 minutes until it becomes foamy and bubbly. This confirms your yeast is alive and ready to work its magic.
Next, add the 3.5 cups bread flour, 1.5 tsp salt, and 0.25 tsp instant yeast to the bowl. The instant yeast will activate immediately, so don't let the dough sit too long before adding the wet ingredients. Mix everything just until combined—you'll want to see a shaggy dough form, but don't overwork it yet. The high-protein bread flour ensures that signature chewy texture we're after.
Incorporate the Wet Ingredients and Begin Kneading
Add the 0.75 cup whole milk (warmed to room temperature), 0.5 cup unsalted butter (cold, cubed), 1 tbsp olive oil, and 1 tbsp honey to the flour mixture. The butter should remain in small cubes at this stage—it'll melt and emulsify during kneading. Use a wooden spoon or your hands to mix everything together until a sticky dough begins to form.
Turn the dough onto a lightly floured surface and knead for 8-10 minutes by hand (or 5-6 minutes in a stand mixer with a dough hook). You're looking for a smooth, elastic dough that springs back when poked. The honey adds subtle sweetness and helps develop that beautiful crust color, while the olive oil keeps the dough tender. If the dough feels too sticky, add 1 tbsp semolina flour at a time until it's manageable—but don't add too much or you'll lose that soft crumb.
First Rise and Shape the Dough
Lightly grease a large bowl with olive oil, place the dough inside, and cover it with a damp kitchen towel. Let it rise in a warm place for 1.5-2 hours, or until it has nearly doubled in size. You'll know it's ready when the dough feels light and springs back slowly when gently pressed. This first rise develops the gluten structure that gives artesano bread its signature chew.
Once risen, punch down the dough to release air and divide it into 2 equal pieces (about 1 pound each). Shape each piece into a smooth, slightly tapered oval loaf. The tapered shape helps create that classic bakery-style crust. Place the shaped loaves on parchment-lined baking sheets, seam-side up, and cover them again with a damp towel. Let them rest for 20-30 minutes while you preheat the oven to 375°F. This resting period relaxes the gluten, making the final shaping easier.
Score, Bake, and Create the Crisp Crust
Preheat your oven to 375°F with a baking stone or inverted baking sheet inside—this helps create steam for that perfect oven spring. Once the oven is hot, brush the loaves with a little water (using a pastry brush) and sprinkle generously with 1 tbsp coarse sea salt. Dust the baking sheets with 0.25 cup cornmeal and 0.25 cup semolina flour for extra crispiness.
Using a sharp razor or very sharp knife, score each loaf 1/4-inch deep in a crosshatch pattern. This allows the bread to expand properly and gives that bakery-style look. Bake for 30-35 minutes, until the crust is deep golden brown and sounds hollow when tapped on the bottom. For that extra-crisp crust, sprinkle 1 tbsp cornstarch over the loaves in the last 5 minutes of baking. The cornstarch helps create that shatteringly crisp exterior while keeping the interior soft and airy.
Cool and Enjoy Your Bakery-Style Bread
Remove the loaves from the oven and let them cool on a wire rack for at least 1 hour before slicing. This resting time allows the steam inside the bread to redistribute, ensuring every slice has that perfect texture. The crust should be crisp and shatterable, while the interior remains soft and slightly chewy—just like the bakery version.
Slice the bread and serve warm with olive oil and flaky sea salt for dipping, or use it for sandwiches. The combination of bread flour, butter, and honey gives this loaf its signature flavor and texture. Store any leftovers in an airtight container at room temperature for up to 3 days, or freeze for up to 3 months. This bread reheats beautifully—just wrap a slice in foil and warm it in the oven at 300°F for 5-10 minutes to restore that fresh-baked texture.
Pro Tips For Making Artesano Bread Copycat
- USE INSTANT YEAST LAST: The copycat recipe calls for both active dry and instant yeast—don’t mix them early. Sprinkle the instant yeast directly into the flour when combining, while the active dry yeast goes into the warm water first. This keeps the yeast active longer and prevents overproofing before baking.
- WEIGH YOUR FLOUR: That "1 cup" measurement in recipes is a lie—bread flour packs differently. Use a kitchen scale for 450g (or 3 cups loosely spooned, then leveled). Overestimating flour makes dough too stiff; underestimating makes it gummy. Trust the scale, not your eyes.
- STOP KNEADING WHEN IT’S TOUGH: The dough should resist but still soften when poked—like pressing your finger into a ripe avocado. Over-kneading develops gluten but also exhausts the yeast. If the dough springs back too fast, it’s overworked. Let it rest 10 minutes, then finish gently.
- BAKE WITH STEAM FIRST: Preheat your oven to 425°F (220°C), then place a metal tray on the lower rack. Pour 1 cup hot water into it right before baking. The steam mimics a professional oven, giving your bread a crisp crust and open crumb—no fancy equipment needed. Just 10 minutes of steam makes a real difference.
Make-ahead tips for artesano bread copycat
Overnight Dough Prep
For maximum flavor and texture, prepare the dough the night before. After the initial 1.5-2 hour rise, place the shaped dough in an airtight container lined with plastic wrap (pressed directly on the surface to prevent drying).
Refrigerate for 8-12 hours—this slow fermentation develops deep, complex flavors. The cold slows yeast activity, creating a more open crumb and that signature artesano texture. I swear by this method for the best results. ⏰
Freezing Unbaked Dough
Make ahead even further by freezing unbaked dough balls. After the first rise, divide the dough into 2 equal pieces and shape into loaves. Wrap each tightly in plastic wrap, then place in a freezer-safe bag with all air removed.
Freeze for up to 3 months. When ready to bake, thaw overnight in the fridge, then proceed with shaping and baking as directed. The dough will rise beautifully after thawing. ❄️
Pre-Baked Storage
Baked loaves keep beautifully for 3 days at room temperature wrapped in a clean kitchen towel (traps moisture better than plastic). For longer storage, cool completely, then wrap tightly in foil and freeze.
Thaw at room temperature for 1-2 hours before serving. The crust stays crisp even after freezing—just reheat slices wrapped in foil at 300°F for 5 minutes to restore freshness. 💡
Batch Baking Tips
Double the recipe for a big batch—just scale all ingredients proportionally. Use two 9x5-inch loaf pans lined with parchment paper for uniform baking. Mark your calendar for 3 days ahead: Day 1 (mix and first rise), Day 2 (shape and refrigerate overnight), Day 3 (bake).
This schedule ensures you're never rushed during the critical baking steps. 📅
Crust Refresh Trick
Revive stale crusts by brushing warm loaves with melted butter and broiling for 2-3 minutes at 400°F. The butter rehydrates the crust while the broiler crisps it back to perfection.
Store refreshed loaves in a paper bag (not plastic) to maintain crispness for an extra day. This works wonders for sandwiches or toast. 🔥
Gift-Worthy Packaging
For presents, wrap cooled loaves in parchment paper, tie with twine, and place in a basket lined with a cloth napkin. Add a small jar of olive oil and a sprinkle of flaky salt for a complete gift set.
The bread stays fresh for 5 days this way. I've given these as gifts at holidays and they're always a hit—people can't believe it's homemade! 🎁
Nutrition facts
Frequently asked questions
Why does this recipe use both active dry yeast and instant yeast?
The combination gives you the best of both worlds: the active dry yeast activates slowly for deep flavor development during the first rise, while the instant yeast works immediately when mixed with the flour. This creates that signature open crumb structure without requiring a long bulk fermentation. The instant yeast also means you don't need to dissolve it in water first—just sprinkle it in!
Can I make this bread without a bread machine?
This recipe is designed for hand mixing and kneading. The key is the 8-10 minutes of kneading by hand (or 5-6 minutes in a stand mixer) to develop proper gluten structure. The overnight cold fermentation does most of the work for you, so you won't need to monitor it constantly. Just follow the shaping and baking instructions carefully.
What's the best way to tell when the bread is fully baked?
Look for three signs: the crust should be deep golden brown, the bread should sound hollow when tapped on the bottom, and an instant-read thermometer inserted into the center should read 190-200°F. The cornstarch sprinkle in the last 5 minutes helps create that crisp exterior while ensuring even baking. Never rely on just one method—combine all three for perfect results.
Why does my crust keep turning out too soft instead of crisp?
This usually happens when the oven isn't hot enough or the bread doesn't bake long enough. Make sure your oven is fully preheated to 375°F with the baking stone inside for 30 minutes before baking. Also, the final 5 minutes with cornstarch are crucial—they create that shatteringly crisp texture. If your crust is still soft, bake for an extra 5-10 minutes until golden brown.
Can I use all-purpose flour instead of bread flour?
You can try, but the results won't be quite the same. Bread flour has a higher protein content (12-14% vs. 10-12% in all-purpose), which gives that signature chewy texture and open crumb. For best results, mix 3 cups all-purpose flour with 1 tbsp vital wheat gluten to approximate bread flour's protein level. The gluten helps create that professional bakery-style texture.