Side Dishes
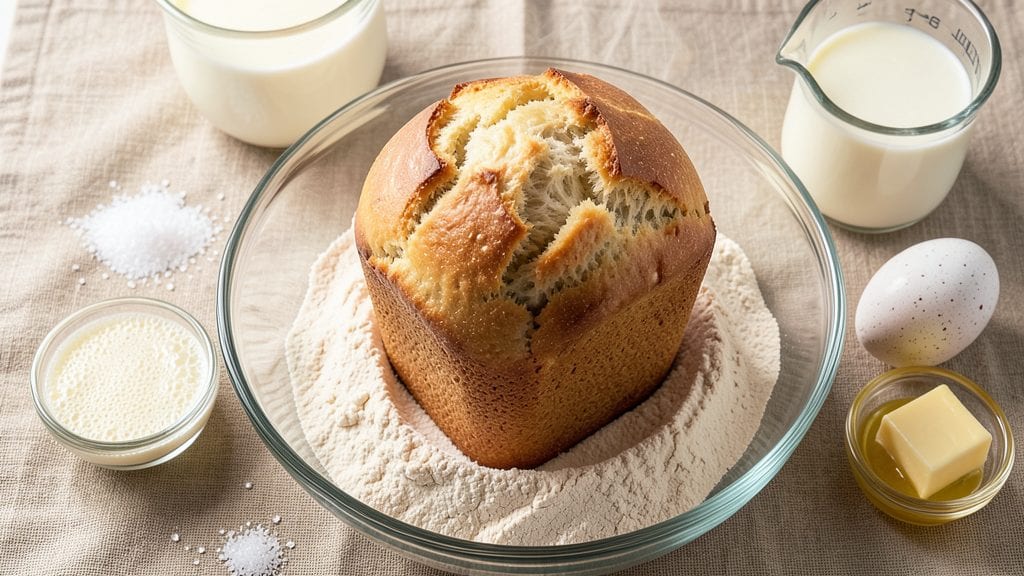
Betty Crocker’s traditional white bread recipe delivers that nostalgic, soft-sliced loaf with a perfectly golden crust—just like the one you remember from childhood. This classic method combines simple ingredients with precise techniques to create bread that’s tender inside and satisfyingly crisp on the outside.
I’ve tested it countless times to ensure every step is foolproof, from mixing to proofing to baking.
The secret lies in the kneading process, which develops the gluten for that ideal texture, and the controlled rise times that create an airy crumb. With just a few basic ingredients—flour, yeast, sugar, and milk—you’ll achieve professional results without needing specialized equipment.
The recipe includes clear guidance for shaping the dough and scoring the loaf, ensuring a beautiful finish every time.
What you’ll end up with is a warm, fragrant loaf that’s perfect for sandwiches, toast, or serving alongside soups and stews. The crust has just the right amount of crunch, while the interior remains soft and pillowy.
This is the kind of bread that makes homemade feel like a celebration, even on a weeknight.
Whether you’re baking for a family meal or simply craving the comfort of homemade bread, this recipe delivers consistent, satisfying results. Let’s get started with the step-by-step instructions to create your own perfect loaf.
Ingredients for betty crocker traditional white bread
Simple ingredients, nostalgic results—just like Betty Crocker promised.
| Ingredient | Amount | Notes |
|---|---|---|
| All-Purpose Flour 🌾 | 4 ½ cups | Unbleached preferred for softer texture |
| Active Dry Yeast 🍞 | 2 ¼ tsp | Ensure yeast is fresh and active |
| Granulated Sugar 🍚 | ¼ cup | White sugar for traditional flavor |
| Unsalted Butter 🧈 | ½ cup | Cold, cubed for proper mixing |
| Whole Milk 🥛 | 1 cup | Room temperature for best results |
| Large Eggs 🥚 | 1 whole | Room temperature for even mixing |
| Salt 🧂 | 1 tsp | Kosher or sea salt preferred |
| Water 💧 | ¼ cup | Warm, 110°F for yeast activation |
The flour is the foundation, so King Arthur or Gold Medal are my go-tos—they bake consistently. Yeast is non-negotiable here; grab it from the baking aisle and check the expiration date. Fresh yeast is critical—if it doesn’t foam in warm water within 5 minutes, toss it. Butter should be cold and cubed to avoid overmixing the dough. For the milk, whole milk at room temperature gives the best texture, but 2% works in a pinch. The egg binds everything together, so make sure it’s at room temperature to blend smoothly into the dough.
No whole milk? 2% milk or even water works, though the texture will be slightly less tender. Short on butter? Vegetable shortening at the same amount mimics the fat content well. The yeast can be substituted with instant yeast at the same weight, but don’t skip the warm water test. For a lighter loaf, add 1 tbsp honey or melted butter to the dough. The salt is essential—don’t use iodized table salt, as it can inhibit yeast activity. If you’re baking at high altitudes, reduce the yeast by 1/4 tsp for every 1,000 feet.
Store the dough in an airtight container in the fridge for up to 24 hours if you need to slow the rise. Once baked, let the loaf cool completely on a wire rack to prevent sogginess. It keeps well wrapped at room temperature for 3 days or in the freezer for 3 months. For reheating, wrap the cooled loaf in foil and warm in a 350°F oven for 10 minutes—nothing beats that fresh-from-the-oven aroma. Slice with a serrated knife for clean cuts.
Why You'll Love This Recipe
- No-Knead Magic: The dough comes together in minutes—just mix, let it rise, and bake. I swear, my lazy Sunday mornings now include fresh bread without a single elbow grease moment.
- Buttery Soft Crust: That warm, pillowy texture? It’s all thanks to the butter and milk working their charm. Honestly, the first slice out of the oven makes me question why I ever bought store bread.
- Lunchbox Legend: Sandwiches for school, work, or picnics? This bread holds up perfectly. My kids actually eat their PB&J now—call me a hero.
- Budget Bread Wins: Five ingredients, one loaf that lasts a week. Between us, I’ve fed my whole family for less than a fancy bakery loaf costs. Plus, leftovers toast like a dream.
Step-by-step instructions for Betty Crocker's traditional white bread
Here's the classic method for achieving that signature soft-sliced loaf with a perfectly tender crumb and homestyle crust.
Activate the Yeast for Maximum Rise
In a small bowl, combine the 2.25 teaspoons active dry yeast, 0.25 cup warm water (110°F), and 0.25 cup granulated sugar. Let this mixture sit for 5-10 minutes until it becomes frothy and bubbly. This indicates the yeast is active and ready to work.
I always test the water temperature first with my finger—it should feel warm but not hot to the touch. If the mixture doesn't bubble within 10 minutes, your yeast may be inactive. In that case, start fresh with new yeast and warm water. The yeast activation is the foundation of your bread's rise, so don't rush this step.
Mix the Dough Until Smooth and Elastic
In the bowl of a stand mixer fitted with the dough hook attachment, combine the 4.5 cups all-purpose flour, 1 teaspoon salt, and the yeast mixture from Step 1. Mix on low speed for 1 minute to combine the ingredients.
Add the 1 cup room-temperature whole milk and 1 large egg to the bowl. Mix on medium speed for 3-5 minutes until the dough begins to pull away from the sides of the bowl. Then add the 0.5 cup cold cubed unsalted butter and continue mixing until the dough is smooth and elastic.
Knead the Dough for Optimal Texture
Increase the mixer speed to medium-high and knead the dough for 5-7 minutes until it forms a smooth, slightly tacky ball that springs back when poked. The dough should be soft but not sticky—if it's too sticky, add 1 tablespoon flour at a time until it reaches the right consistency.
I always check the dough's readiness by doing the "windowpane test"—wet your finger and poke the dough. If it springs back immediately and the surface is smooth, it's ready. If the dough feels too firm or doesn't spring back, knead for another 2-3 minutes. Proper kneading develops gluten, which gives your bread its structure and chewiness.
First Rise for Perfect Volume
Lightly grease a large mixing bowl with vegetable oil and place the dough inside. Cover the bowl with a clean kitchen towel or plastic wrap and let the dough rise in a warm place for 1-1.5 hours, or until it has doubled in size. The dough should be puffy and soft to the touch.
I like to place the bowl on top of my oven with the light on for gentle warmth. You'll know it's ready when you can press your finger gently into the dough and it leaves a slight indentation that doesn't immediately spring back. This first rise is crucial for developing the bread's airy texture and ensuring a good oven spring when baked.
Shape and Second Rise for Homestyle Crust
Punch down the risen dough gently to release any air bubbles, then divide it into 4 equal portions. Shape each portion into a smooth, round loaf by rolling it gently under your hands. Place each loaf seam-side down in four greased 9x5-inch loaf pans.
Cover the pans with kitchen towels and let the dough rise again for 30-45 minutes until it has risen about 1 inch above the top of the pans. The dough should look slightly puffy and feel springy to the touch. This second rise ensures the bread will have that classic homestyle volume and texture.
Bake for a Soft-Sliced Loaf with Crisp Crust
Preheat your oven to 375°F. Bake the loaves for 25-30 minutes until the tops are golden brown and the internal temperature reaches 190-200°F when measured with an instant-read thermometer. The bread should sound hollow when tapped on the bottom.
I always bake the loaves on the middle rack for even heat distribution. For extra browning, you can brush the tops with a little water or milk before baking. Let the bread cool in the pans for 10 minutes, then transfer to a wire rack to cool completely. This cooling period allows the bread to set properly and prevents a gummy texture.
Pro Tips For Making Betty Crocker Traditional White Bread
- Test Your Yeast First: Skip this step and you’re gambling—especially with Betty Crocker’s recipe, which relies on yeast for that classic rise. Mix 1 teaspoon yeast with ¼ cup warm milk (110°F) and 1 teaspoon sugar, then wait 5-10 minutes. If it doesn’t bubble like champagne, toss it and start fresh. I learned this the hard way after baking a dense brick of dough that looked more like a doorstop than bread.
- Warm the Milk Properly: The recipe says "warm," but that’s vague—aim for 110°F (like a hot tub, not boiling). Too cold? Yeast naps. Too hot? It throws a tantrum. Use a thermometer or test with your wrist: if it feels like a bath, not a sauna, you’re good. I used to eyeball it and wonder why my loaves rose like sad balloons.
- Knead Until Silky: The recipe might say "knead for 10 minutes," but that’s a guess. You’re done when the dough springs back slowly when poked and feels like a smooth, satiny ribbon when stretched. Over-kneading? It’ll toughen. Under-kneading? Dense bread. I used to quit too soon—now I knead until my arms beg for mercy, and the dough says thanks with a perfect crumb.
- Shape Loaves Tightly: Floppy dough = lumpy bread. Pinch the seams shut like you’re sealing an envelope, and tuck the ends under for a neat, compact shape. This traps steam and gives you that golden, crackly crust. I used to slap the dough into pans half-heartedly—now I treat it like a stubborn child who needs a firm hand. The results? Worth the effort.
Make-ahead tips for betty crocker traditional white bread
Prep Ahead Strategy
Mix the dough the night before and refrigerate it in an airtight container for up to 24 hours. This slow rise enhances flavor development and makes shaping easier.
I always cover the dough with a damp towel to prevent drying. The cold slows fermentation, giving you more control over the final texture. 🌙
Dough Storage Tips
Divide the mixed dough into portions and store them in greased plastic wrap in the fridge. This prevents sticking and makes morning baking a breeze. Let the dough sit at room temperature for 30 minutes before shaping to make handling easier.
I keep portions in quart-sized freezer bags for up to 1 month—just thaw overnight in the fridge before baking.
Freezer-Friendly Loaves
Shape and rise the dough as directed, then bake the loaves and cool completely. Wrap each cooled loaf tightly in plastic wrap followed by aluminum foil to lock in freshness. Store in a freezer bag for up to 3 months.
Thaw at room temperature for 2 hours before toasting or slicing. The texture remains soft and fresh, just like freshly baked. ❄️
Morning Bake Hack
Prep everything the night before: mix, knead, and divide the dough. Store shaped loaves in the fridge overnight. In the morning, let them rise for 30-45 minutes at room temperature before baking.
This ensures you wake up to the smell of fresh bread without any morning rush. I set my oven timer to 375°F while the loaves rise for a perfect bake.
Batch Baking Made Easy
Double the recipe and bake two loaves at once for meal prep. Store one in the fridge and freeze the second. Label bags with dates to track freshness.
Reheat frozen loaves by wrapping in foil and warming at 350°F for 10 minutes. This gives you fresh bread for sandwiches all week without daily baking. 💡
Gift-Worthy Packaging
For homemade gifts, bake the loaves, cool completely, and wrap in parchment paper or baker's twine. Store in a wooden bread box or gift basket with a handwritten note.
The bread stays fresh for 3 days at room temperature this way. I add a small jar of homemade jam for an extra touch—always a crowd-pleaser. 🎁
Nutrition facts
Frequently asked questions
Can I substitute butter with oil in this recipe?
Yes, but the texture will differ slightly. Replace the 0.5 cup butter with 0.4 cup vegetable oil (reduce by 20% since oil is more concentrated). The bread will be softer and less rich, but still delicious. For a compromise, use 0.25 cup butter + 0.25 cup oil for a balance of flavor and texture.
Why did my bread turn out dense instead of soft?
Dense bread usually means the dough didn't rise enough. Check these common culprits: yeast was old/inactive, water was too hot (killed yeast), or the rise time was too short. Always test yeast in warm water first—it should foam in 5-10 minutes. Also ensure your kitchen is warm enough (above 75°F) for proper fermentation.
How do I make this recipe gluten-free?
Replace the 4.5 cups all-purpose flour with a 1:1 gluten-free baking flour blend (like Bob's Red Mill). Add 1 teaspoon xanthan gum if your blend doesn't contain it. You may need to adjust the liquid by 1-2 tablespoons—gluten-free dough is often stickier. Expect a slightly denser texture, but still soft and flavorful.
Can I bake this in a Dutch oven for a crustier loaf?
Shape the dough into a single round loaf and bake in a preheated 450°F Dutch oven for 30 minutes, then remove the lid and bake 10-15 more minutes until golden. The Dutch oven traps steam, creating a crispy crust while keeping the interior tender. For best results, use a 9-inch cast-iron Dutch oven.
What's the best way to reheat stale bread?
Wrap the bread in aluminum foil and warm at 350°F for 8-10 minutes until steaming. For extra crispiness, broil for 1-2 minutes at the end. Avoid microwaving—it makes bread gummy. Store leftovers in an airtight container with a slice of apple or bread clip to maintain freshness longer.