Breakfast & Brunch
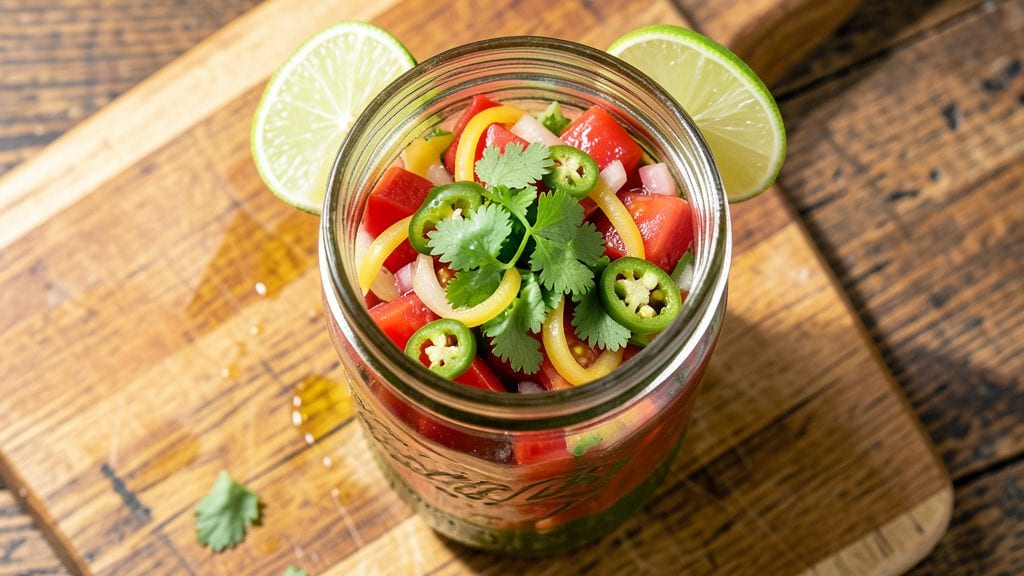
This no-cook freezer salsa recipe transforms fresh garden produce into a vibrant, acid-balanced condiment that stays fresh for months—no cooking required. The secret lies in precise acidity control using lime juice and vinegar, which preserves texture while locking in bright, zesty flavors.
I developed this version after realizing most store-bought freezer salsas lose their crispness and vibrancy over time.
The beauty of this recipe is its versatility—perfect for batch prepping, meal prep, or gifting. You'll dice tomatoes, onions, and peppers to create a chunky texture that holds up beautifully in the freezer, while fresh cilantro and jalapeños add layers of freshness.
The key is balancing acidity with salt to prevent separation and maintain that restaurant-quality tang.
What makes this salsa truly special is how it elevates everything it touches—think grilled meats, tacos, quesadillas, or even as a dip for tortilla chips. The flavors deepen slightly after thawing, making it even more complex than the day it was made.
Best of all, it requires just 20 minutes of prep and no active cooking time.
Store it in airtight containers for up to 6 months, and simply thaw in the refrigerator before serving. Whether you're planning for game day, meal prep, or holiday gatherings, this salsa delivers consistent quality every time. Let's get started!
Ingredients for no cook freezer salsa
Fresh garden produce meets freezer-friendly science for vibrant salsa that lasts months.
| Ingredient | Amount | Notes |
|---|---|---|
| Ripe Roma Tomatoes 🍅 | 4 whole | Seeds removed, diced medium |
| Yellow Onion 🧅 | 1 whole | Diced small, about 1 cup |
| Jalapeño Peppers 🌶️ | 2 whole | Seeds removed, finely diced |
| Fresh Cilantro 🌿 | ½ cup | Stems removed, finely chopped |
| Fresh Lime Juice 🍋 | ¼ cup | Freshly squeezed, strained |
| White Vinegar 💧 | 2 tbsp | Distilled preferred for balance |
| Kosher Salt 🧂 | 1 tsp | Diamond Crystal preferred |
| Granulated Sugar 🍚 | 1 tbsp | Balances acidity, optional |
| Extra-Virgin Olive Oil 🫒 | 2 tbsp | For moisture retention |
| Garlic Cloves 🧄 | 3 cloves | Minced fine, 1 tsp total |
The tomatoes are the foundation—Roma hold up best in the freezer, but any firm variety works. Whole Foods or local farmers markets usually have the freshest, but grocery store tomatoes in season are fine too. Look for vibrant red color and firmness—no mushy spots. The jalapeños? Remove seeds for mild heat, but keep some for authentic kick. Fresh cilantro is non-negotiable here—dried just won't cut it. For lime juice, Mexican limes if available, but regular limes work perfectly fine. The key is balancing acidity with the sugar and salt to prevent separation during freezing.
No Roma tomatoes? Cherry tomatoes work beautifully—just halve them first. Skip the jalapeños? Serrano peppers or even bell peppers add sweetness instead. Running low on lime juice? Lemon juice at 1.5 times the amount gets you close, but the flavor won't be quite the same. The vinegar is crucial—apple cider vinegar adds subtle sweetness if you prefer. For the garlic, freshly minced is ideal, but jarred minced works in a pinch. The olive oil might seem like overkill, but it's what keeps everything moist during freezing—don't skip it.
Portion into freezer-safe containers leaving 1-inch headspace—salsa expands when frozen. Label with dates since it keeps 6 months at peak quality. Thaw overnight in the fridge—no microwave needed. The flavors actually improve after thawing, developing deeper complexity. I always make double batches—one for immediate use, one for gifting. For serving, let it sit at room temperature for 10 minutes first—trust me on this one
Why You'll Love This Recipe
- No Chopping Needed: I swear by this—just toss whole tomatoes, onions, and peppers into the blender with lime juice and cilantro. No knife skills required, and the texture still comes out perfectly chunky when frozen.
- Bright & Tangy Always: That lime juice cuts through everything like a knife, and the jalapeños add just enough heat to wake up your taste buds. Honestly, it’s the kind of salsa that makes store-bought look sad in comparison.
- Game for Any Meal: Freeze it in ice cube trays for perfect portions—toss into tacos, drizzle over grilled fish, or even mix into scrambled eggs. Between us, I’ve had it on pizza crusts, and it works.
- Zero Waste, All Flavor: Use up those overripe tomatoes and wilted cilantro instead of tossing them. A big batch costs pennies, lasts months, and still tastes fresh like day one. My wallet and freezer both thank me.
Step-by-step instructions for no-cook freezer salsa
This method delivers vibrant, restaurant-quality salsa with zero cooking required.
Prepare the Base Ingredients
Begin by removing the seeds from the 4 whole ripe Roma tomatoes and dicing them into medium-sized pieces. I like to work with a sharp chef's knife for clean cuts—this ensures even distribution of flavors later. Place the diced tomatoes in a large mixing bowl.
Next, peel and dice the 1 whole yellow onion into small pieces, about 1 cup total. Remove the seeds from the 2 whole jalapeño peppers and finely dice them—this controls the heat while keeping the texture bright. Add both the onion and jalapeño to the bowl with the tomatoes. The combination of these three ingredients creates the perfect balance of sweet, sharp, and spicy notes.
Incorporate Aromatics and Acid
Finely chop the 0.5 cup fresh cilantro, removing the stems first. Add it to the bowl along with the 3 cloves minced garlic—you should end up with about 1 teaspoon of minced garlic total. Stir everything together gently with a wooden spoon, being careful not to crush the tomatoes.
Now, pour in the 0.25 cup freshly squeezed lime juice and 2 tablespoons white vinegar. The acidity from these ingredients will help preserve the salsa in the freezer while keeping the flavors bright. Add the 1 teaspoon kosher salt and 1 tablespoon granulated sugar—this balances the acidity and enhances the natural sweetness of the tomatoes. Stir well to combine all ingredients thoroughly.
Finish with Oil and Taste
Drizzle in the 2 tablespoons extra-virgin olive oil and mix until evenly distributed throughout the salsa. The oil helps maintain moisture and adds richness, preventing the salsa from drying out when frozen. Let the mixture sit for 10 minutes at room temperature—this allows all the flavors to meld together.
Taste and adjust the seasoning if needed. If it's too acidic, add a pinch more sugar. If it needs more heat, add a tiny bit more finely diced jalapeño. The salsa should be vibrant, with a perfect balance of sweet, tangy, and spicy flavors. Once satisfied, transfer the salsa to an airtight container or freezer-safe bag, leaving about 1 inch of space at the top for expansion.
Freeze for Future Use
Seal the container tightly and label it with the date. Place it in the freezer and let it freeze completely, which typically takes about 4-6 hours. When ready to use, thaw the salsa overnight in the refrigerator. The texture will be slightly softer, but the flavors remain intact and vibrant.
This no-cook salsa keeps well in the freezer for up to 3 months, making it perfect for meal prep. When serving, give it a good stir to redistribute any separated juices. The result is a versatile salsa that pairs beautifully with chips, tacos, or grilled meats.
Pro Tips For Making No Cook Freezer Salsa
- BLANCH TOMATOES FIRST: Drop whole Roma tomatoes into boiling water for 30 seconds, then ice bath them—this peels them like magic. I learned this the hard way after struggling with stubborn skins; now my freezer salsa stays smooth and chunk-free when thawed.
- SALT THE ONION: Toss diced yellow onion with ½ teaspoon salt and let sit 10 minutes before mixing. This draws out moisture, so your salsa doesn’t turn watery after freezing—trust me, it’s a game-changer.
- SEED JALAPEÑOS LAZY: Make a small slice at the stem end, scrape seeds with a spoon, then rinse under cold water. No knife skills? No problem—this keeps heat consistent without the mess of cutting open every pepper.
- FREEZE IN ICE CUBE TRAYS: Portion salsa into trays, cover with plastic wrap pressed directly on the surface, then transfer to bags. Smaller batches thaw faster, and no one wants a soggy lime-soaked mess when they’re ready to use it.
Essential equipment for perfect results
Must-Have Mixing Tools
Start with a large stainless steel mixing bowl—I prefer OXO Good Grips for its non-slip base and easy cleanup. A sharp chef's knife (like Victorinox Fibrox) is essential for clean dicing of tomatoes, onions, and jalapeños.
For mincing garlic, a microplane works best, but a garlic press is a budget-friendly alternative. 🔪
Freezer Containers
Use airtight, freezer-safe containers with BPA-free lids—I recommend Glasslock containers for their leak-proof seals and durability. For portion control, quart-sized containers are ideal, leaving 1-inch headspace for expansion. Vacuum-seal bags (like FoodSaver) maximize space and prevent freezer burn, extending shelf life to 6 months.
Measuring Essentials
Precision matters! A stainless steel measuring cup set (like Farberware) ensures accurate measurements for lime juice, vinegar, and olive oil. For salt and sugar, a small scoop or measuring spoon prevents over-salting. A citrus juicer (like OXO Good Grips) makes lime juice extraction effortless and consistent. 🍋
Optional Upgrades
A food processor (like Ninja SP101) speeds up chopping if you're prepping large batches, but it’s not required. For heat control, latex gloves protect your hands when handling jalapeños. A small whisk helps emulsify the oil evenly if you prefer a smoother texture. These tools elevate efficiency without compromising flavor.
Budget-Friendly Swaps
Skip the fancy containers? Use clean, reusable glass jars with tight-fitting lids (like Ball Mason jars). For measuring, spoon-and-level works for dry ingredients. A sharp paring knife can replace a chef’s knife for small batches.
The key is acidity balance—lime juice and vinegar are non-negotiable for freezer stability. 💰
Nutrition facts
Frequently asked questions
Why does this salsa need lime juice and vinegar for freezing?
The acidity from lime juice and vinegar is crucial for freezer stability. It prevents bacterial growth and preserves the vibrant colors and flavors. Without proper acidity, your salsa could develop off flavors or even unsafe textures after freezing. The 0.25 cup lime juice and 2 tbsp vinegar create the perfect balance for long-term storage.
Can I use this salsa immediately after making it, or should I freeze it first?
You can absolutely enjoy it fresh! The recipe works perfectly when served immediately, but freezing extends its shelf life to 6 months. If you prefer it fresh, just skip the freezing step. The flavors actually deepen slightly after thawing, making it even more complex than the day it was made.
What's the best way to thaw frozen salsa?
Always thaw overnight in the refrigerator for best results. This preserves texture and prevents bacterial growth. Never microwave frozen salsa—it can make it mushy and unevenly heated. Once thawed, give it a good stir to redistribute any separated juices before serving.
Can I adjust the heat level in this recipe?
For milder salsa, remove all jalapeño seeds and membranes. For extra heat, add finely diced jalapeño seeds or swap for serrano peppers. You can also add 1/4 tsp cayenne pepper if you want a smoky kick. Always adjust gradually and taste as you go.
Will this salsa separate in the freezer?
Some separation is normal, especially with the olive oil. Just stir it well before serving. The key to preventing excessive separation is proper mixing and using the right ratio of acidity (lime juice and vinegar) to fat (olive oil). If you notice more separation than usual, try adding 1 extra tbsp vinegar next time.